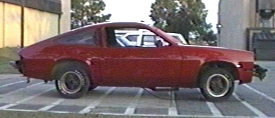
Our '76 Monza 2+2 Concept Car... Some Day!
Send me your drawings and ideas and I'll post them here!
Send me your drawings and ideas and I'll post them here!
Fact: The Chevy Monza and Vega Drag Coefficients are as follows.
| Monza 2+2 | 17.5 | 0.40 | 52.9 | 85.8 |
| Monza Towne Coupe | 17.4 | 0.42 | 55.3 | 89.5 |
| Vega Hatchback | 18.1 | 0.40 | 54.8 | 88.7 |
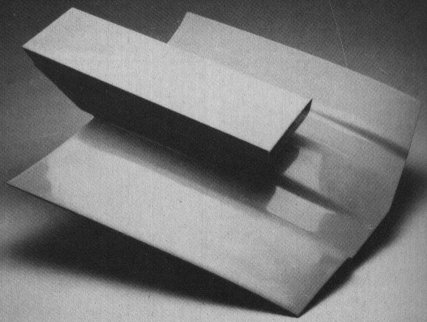
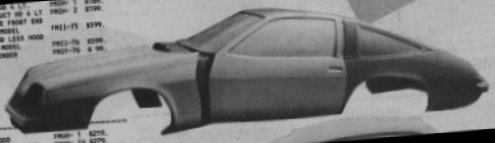
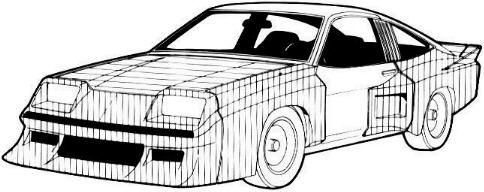 1975-76 Monza This illustration features the Monza 2+2 vehicle with vehicle performance panels shown. These panels designed by Chevrolet, were for the purpose of upgrading the production vehicle's performance. These Monza 2+2 fiberglass replacement body panels were originally designed for road race usage. The panels were developed in a full scale wind tunnel where the overall vehicle drag coefficient was reduced more than 24% compared to the production Monza while providing vehicle anti-lift forces. | ||||
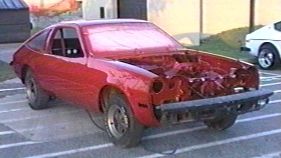
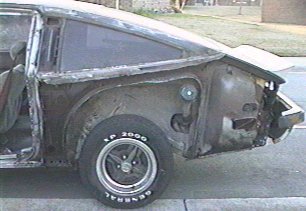
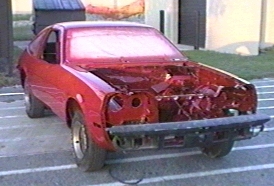
1. Mig-weld all the stress cracks in the body that the twisting torque of the 332 cu.in. engine had put there.
2. Completely replaced the left-rear quarter panel. This meant cutting most of the existing quarter off. Then drilling out all of the spot-welds, even those that were in the door jam, fender well, hatchback area, and under the car. With all this material removed, I picked up the damaged fender that had all of the body filler in it and it weighed at least 10 pounds more than the fender we were preparing to put on the car, hey that's 10 pounds less to have to drag around. Once the old shell was removed there was nothing but skeleton left. It was interesting to see just how the car was put together and what is involved in just this one corner of the car. Anyway, the replacement fender from a local wrecking yard was prepped to be installed. This meant removing all paint and separating all extra metal from the outer skin and prepping the metal for mig-welding. The fender was held in place by locking pliers and a friend of mine, Bart Swisher, and I slowly spot-welded the skin onto the car. It is important to note that you must weld a spot quickly and then go at least 4 or 5 inches away for the next spot-weld so as to prevent the heat from warping the sheet metal which is easy to do and very hard to fix. After every edge had this 4 inch spacing spot weld, I then applied a spot-weld between each weld so that when finished I had a spot-weld every 2 inches.
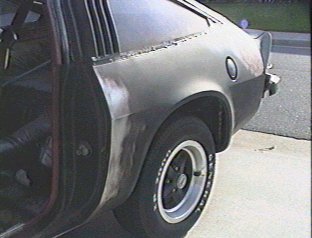
4. We had planned to remove all emblems and the door handles as well. We also wanted to install a round gas door to cover the gas cap but we didn't get around to that, maybe next time. Filling in the emblem holes was straight forward, filling the door handle areas required some ingenuity. We first made a tracing of the rectangular door handle recesses and then cut some matching pieces from the old fender that we removed earlier. The pieces were held in place with magnets while I mig-welded them in place, in between each weld, we quenched the heat buildup with a cold water soaked rag. This helped reduce any warpage induced by the welding in such a small location. After, a little filler material was applied and blended into the surrounding area nicely.
5. Now how was I going to get in? This was accomplished by using a Dodge Colt starter solenoid for each door with some hand made linkages to pull on the internal door levers to open the door. The solenoids were mounted using muffler clamps bolted to the inner door frame. Heavy duty 32 amp relays are used to control the door solenoids so that low voltage actuator switches could be used. The relays are surrounded by enough metal to prevent accidental or malicious activation. I really departed from the norm in the switches, they are very hi-tech and to my knowledge have never been used for this purpose. For security reasons I won't discuss them, but I can only tell you to use your imagination here. The hatchback was left key operated in case of battery or relay failure. That way, in case of emergency, I can always enter through the rear hatch.
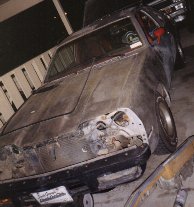
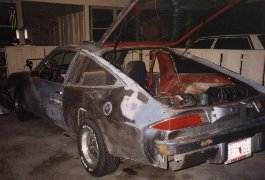
6. Next I removed a portion of the firewall and trimmed the V8 engine mounts to give the engine and headers more room and sand blasted the engine compartment and prepped it for paint.
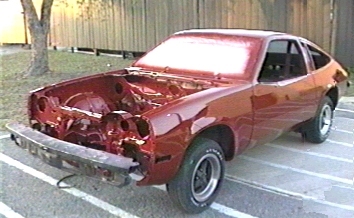
7. After the primer was applied and dried, we block sanded the car and fixed a few areas we had missed earlier. We then painted the car with one coat of red and block sanded again, we then fixed a few remaining minor defects and sprayed several more coats of red.
 |
 |
|
U.S. Body Source
9009 SE CR 325
Hampton, FL 32044
(352)-468-2203
Fax: (352)-468-2164
Web Site: http://www.usbodysource.com
Back to Building the V8 H-Body
http://www.v8monza.com